Printing & receipts
POS Cash Register ESC/POS thermal receipt printers पर print करता है — universal receipt-printer standard। कोई certified-model list नहीं है; कोई भी 58 mm या 80 mm ESC/POS thermal printer काम करना चाहिए। Live जाने से पहले एक short print से test करें।
Web browser build में printing उपलब्ध नहीं है।
Connection types
तीन connection types उपलब्ध हैं; platform support अलग-अलग है:
| Wi-Fi | Bluetooth | USB | |
|---|---|---|---|
| Android | ✅ | ✅ | ✅ (USB-OTG) |
| iOS | ✅ | ✅ | — |
अपना printer सेट करें
सेटिंग्स खोलें (होम app bar में गियर icon) और Receipt section तक scroll करें।
-
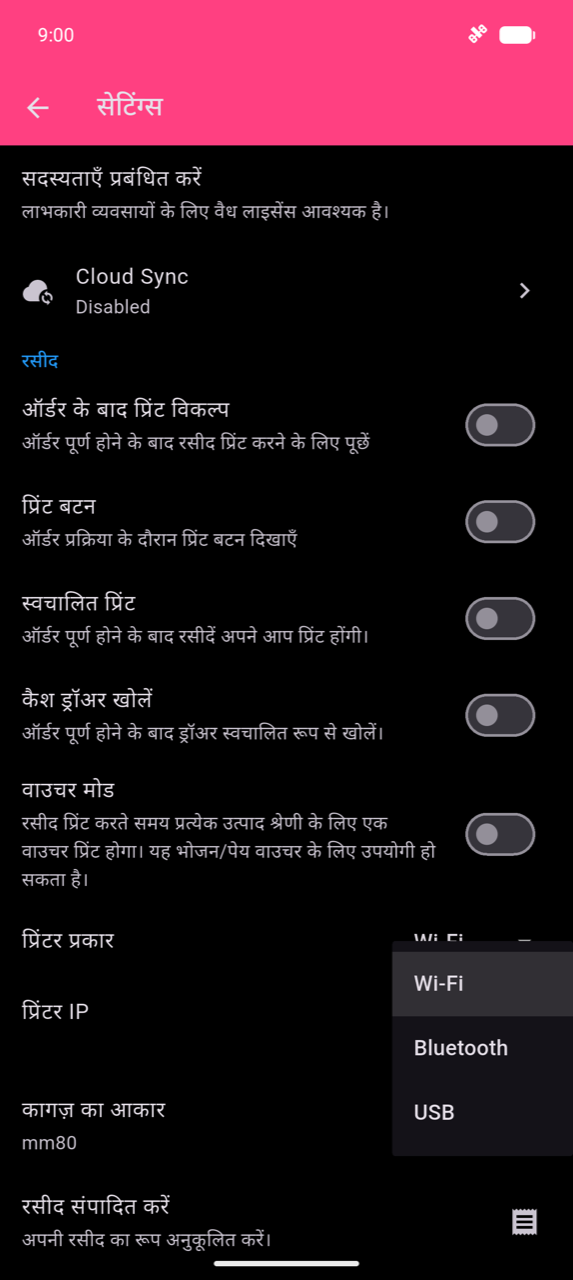
Printer type टैप करें और Wi-Fi, Bluetooth, या USB चुनें। केवल आपके platform पर supported options दिखते हैं।
-
अपने चुने हुए type के लिए connection configure करें:
Wi-Fi — Printer IP टैप करें। ऐप आपके local subnet को port 9100 पर scan करता है और "Printers on network" dialog में responding printers list करता है। अपना printer चुनें और OK टैप करें।
Note
Device और printer same Wi-Fi network पर होने चाहिए। Printer पर Port 9100 (raw/JetDirect) reachable होना चाहिए।
Bluetooth — Printer bluetooth address टैप करें। ऐप आपके already-paired Bluetooth devices को "Bluetooth printers" dialog में list करता है। अपना printer चुनें और OK टैप करें।
Warning
ऐप केवल वे printers list करता है जो phone के system Bluetooth settings में already paired हैं — यह आपके लिए pair नहीं करता। पहले अपने phone के Bluetooth settings में printer pair करें, फिर यहाँ वापस आएँ।
USB — USB प्रिंटर टैप करें। ऐप connected USB devices discover करता है और "USB Printers" dialog में list करता है। अपना printer चुनें और OK टैप करें। Android पर USB-OTG required है।
-
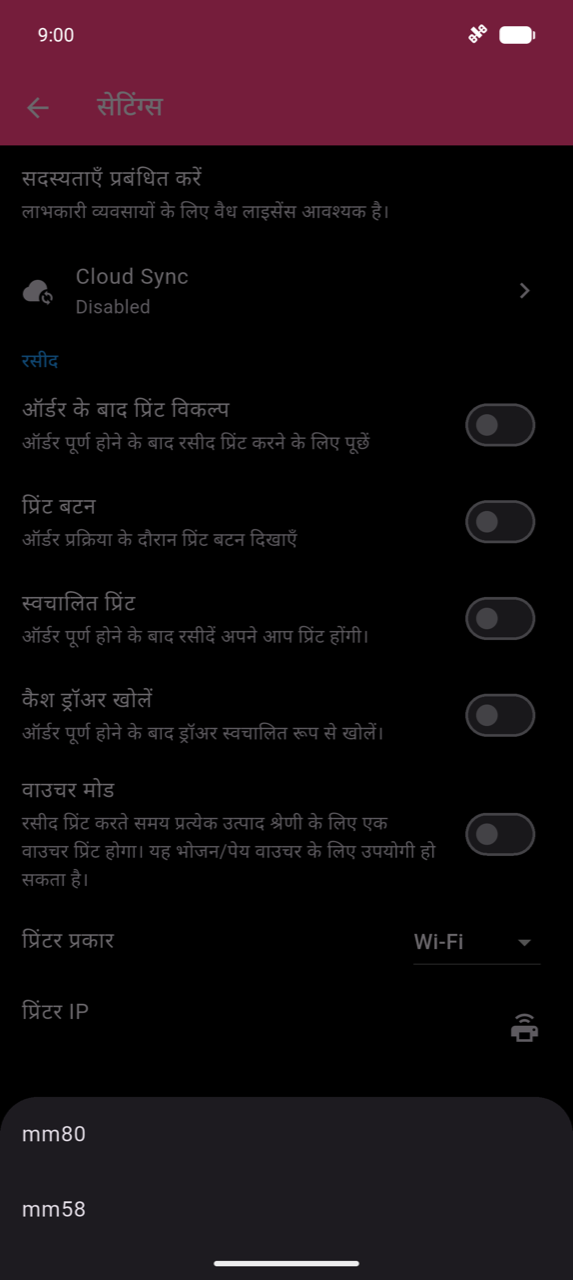
कागज़ का आकार टैप करें और अपने printer roll से match करने के लिए mm80 या mm58 चुनें।
-
Receipt content customize करने के लिए रसीद संपादित करें टैप करें — नीचे Receipt extras देखें।
-
यदि आपके पास printer के RJ11 port से connected cash drawer है, तो same Receipt section में कैश ड्रॉअर खोलें enable करें। ऐप हर receipt के अंत में cash-drawer kick signal भेजता है।
Troubleshooting
अगर print job hang होती लगे: हर job "Printing failed!" report करने से पहले automatically 6 बार retry करती है। दूसरा print trigger करने से पहले सभी retries खत्म होने का इंतज़ार करें — retries चलते समय re-send करने से duplicate prints हो सकते हैं।
अगर receipt output गलत दिखे (garbled text, misaligned columns, या logo जो print न हो), सेटिंग्स → रसीद संपादित करें में compatibility options try करें:
| Setting | कब use करें |
|---|---|
| Image print compatibility mode | Logo गलत print हो — logo rendering को raster graphics पर switch करता है |
| Receipt layout compatibility mode | Text misaligned हो या columns garbled हों — हर row को image के रूप में render करता है; धीमा, लेकिन stubborn printers fix करता है |
| Custom print width | Image rendering के लिए pixel width fine-tune करें (296–600 px; Auto = 448 px) |
Non-Latin scripts (CJK, Thai, Arabic, Devanagari, आदि) बिना किसी manual setup के काम करते हैं। यदि कोई character natively render नहीं हो पाता, तो ऐप automatically उस row को image के रूप में redraw करता है।
Receipt extras
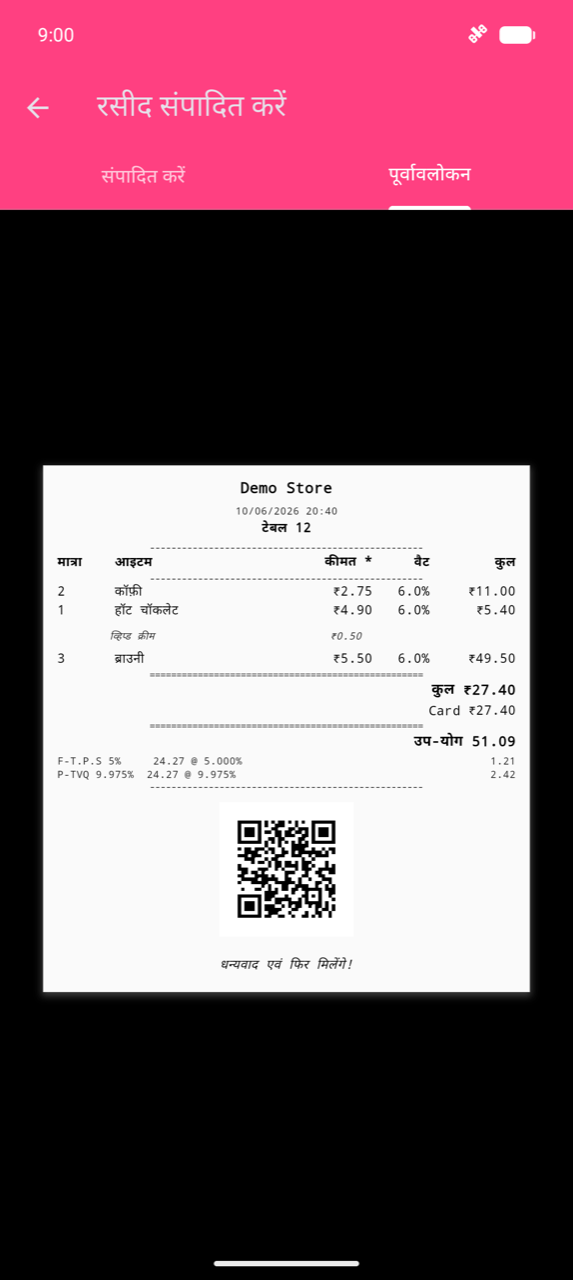
सेटिंग्स → रसीद संपादित करें में configure करें। Preview tab आपकी receipt कैसे print होगी इसका rendered sample दिखाता है।
- Logo — Choose logo टैप करें और एक
.pngfile चुनें। JPG और अन्य formats supported नहीं हैं। ऐप image को paper width के अनुसार auto-scale करता है। - Show QR Code on Receipt — receipt के bottom पर order ID encode करने वाला QR code print करता है, बाद में order lookup के लिए useful।
Reprinted receipts को originals से अलग करने के लिए automatically " COPY " marked होती हैं।
Print triggers
Checkout screen में print button default से hidden है। इसे और अन्य print triggers सेटिंग्स → Receipt में enable करें:
| Setting | Behaviour |
|---|---|
| स्वचालित प्रिंट | Order complete होने पर automatically print होती है |
| ऑर्डर के बाद प्रिंट विकल्प | Checkout के बाद print prompt दिखाता है |
| प्रिंट बटन | Checkout screen के अंदर manual print बटन जोड़ता है |
Voucher और kitchen ticket printing (Voucher mode) receipt के साथ दूसरे document के रूप में print होती है — देखें भुगतान।