Payments
Payment methods
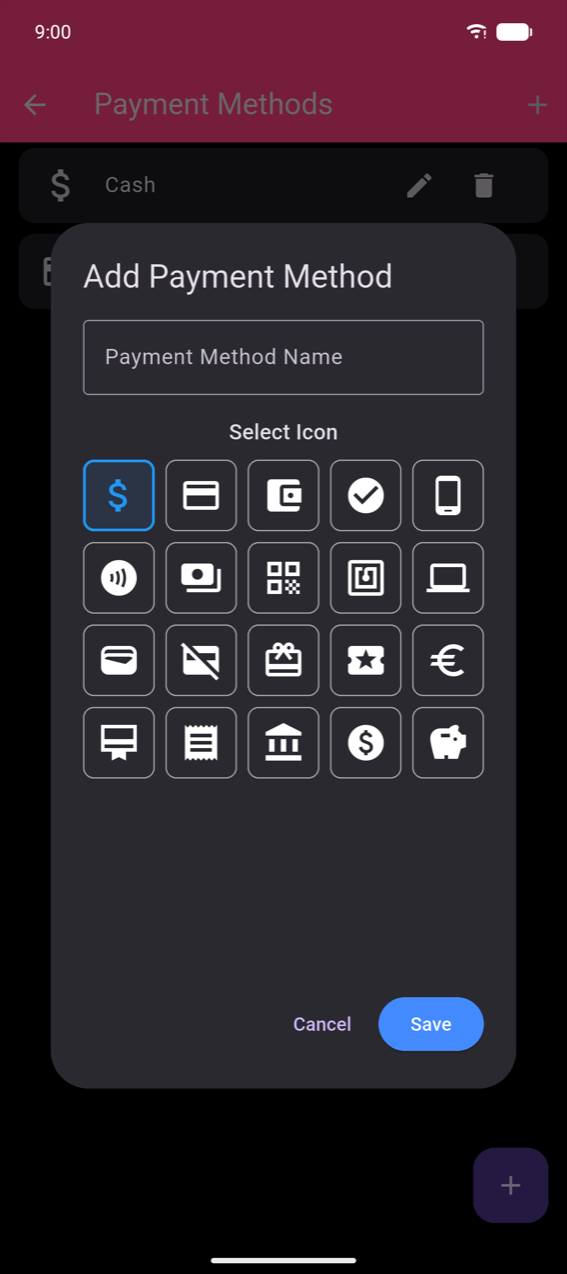
Payment methods are configured in Settings → Payment Methods. The app creates Cash and Card by default. To add a custom method:
- Go to Settings → Payment Methods and tap +.
- Enter a Payment Method Name and choose an icon from the grid.
- Tap Save.
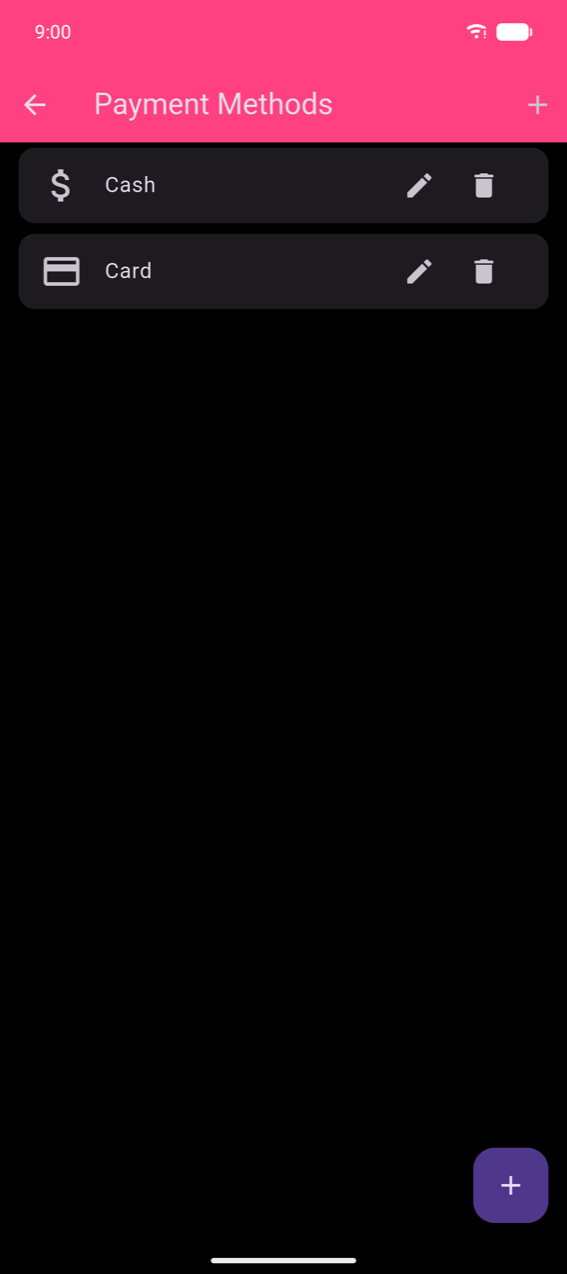
Tap the pencil icon to rename a method or change its icon. Tap the trash icon to delete it.
Note
The Card payment method does not communicate with a card terminal or charge the customer's card. It only records that the customer paid by card. Connect your physical card terminal separately — the app has no integration with card readers.
Completing an order
Once you have added items, the bottom bar of Take order shows one colored button per configured payment method. Tap a button to complete the order instantly with that method.
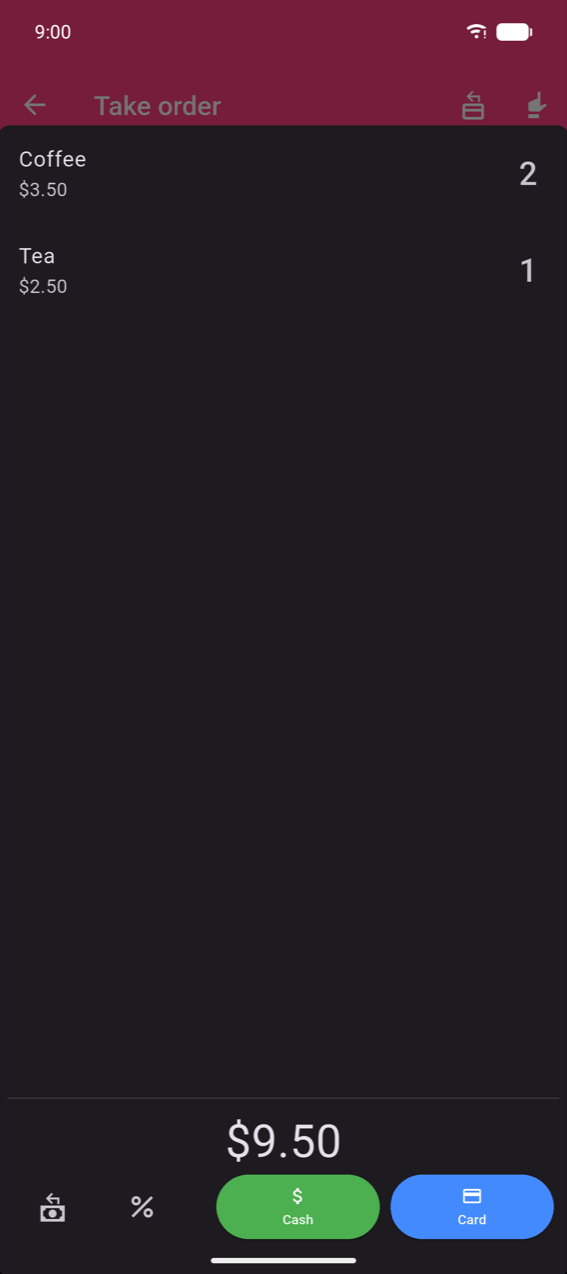
Tapping Cash or Card (or any custom method) records the sale at the full amount with no change calculation.
The bottom bar also shows: - Change calculator — always visible; tap to open the numpad and calculate change (see below) - % Discount — apply a discount before payment (see Discounts below) - Print (optional) — prints the receipt immediately; appears only when Printing button is enabled in Settings (see Printing & receipts)
Change calculator
To enter the amount tendered and calculate change:
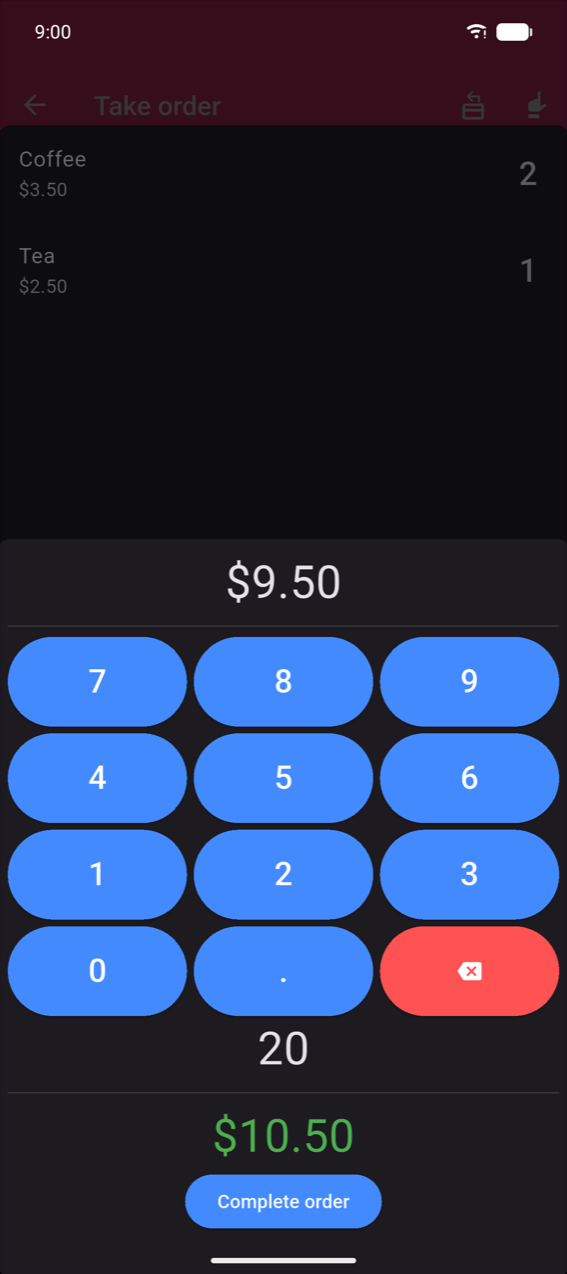
- Tap the change calculator icon at the far left of the bottom bar.
- Type the amount the customer hands you on the numpad.
- The change owed appears in green below the pad.
- Tap Complete order to finalise the sale as Cash.
Note
Only orders completed through the change calculator count towards Cash received in the cash-session summary. Orders completed by tapping the Cash button directly are not included in that total. See Cash sessions.
Discounts
You can apply a discount to the whole order or to an individual product line, before payment. Two discount types are available: percentage (e.g. 10%) or fixed amount (e.g. $2.00 off).
Order-level discount. Tap the % icon in the bottom bar to open Apply discount for the whole order. While a discount is active, the icon turns teal.
Line-level discount. Swipe a product line left in the checkout overview to reveal the teal Discount action for that line only.
Both open the same discount dialog:
- Toggle between % (percentage) and the currency symbol (fixed amount).
- Enter the value. The New total preview updates live below the field.
- Optionally enter a Reason (e.g. "regular customer", "damaged box") — it prints alongside the discount line on the receipt.
- Tap Ok to apply. To remove an existing discount, tap Remove discount (shown in red when a discount is already set).
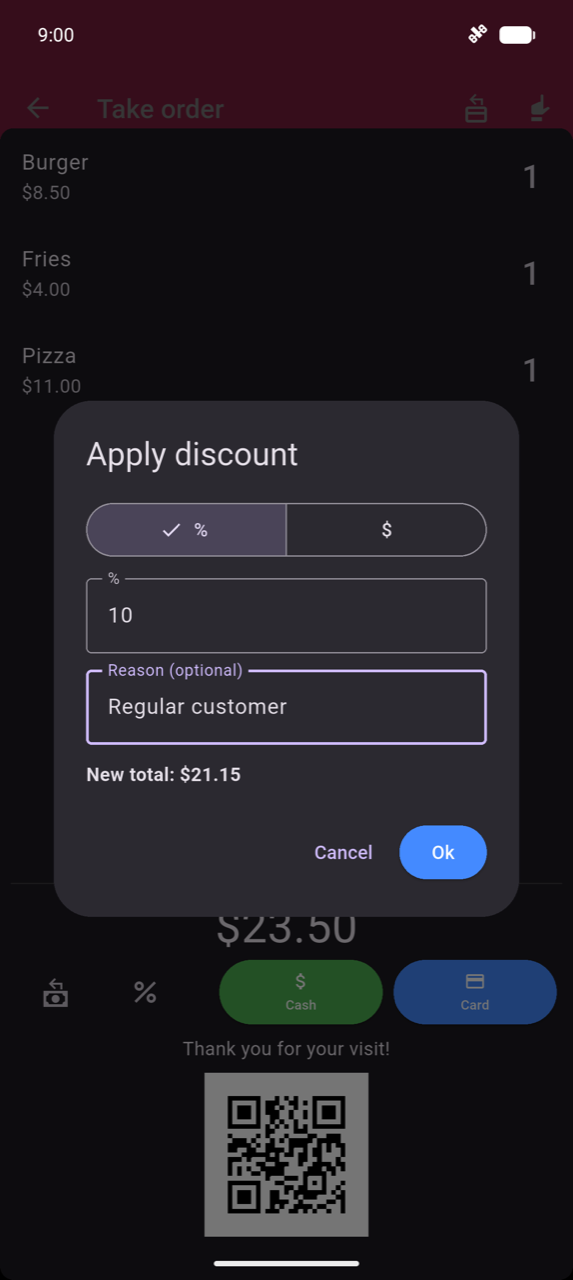
Discounts can only be applied before payment. To change a discount on a completed order, use the Amend flow — see Order history.
Note
The app has no tip, gratuity, round-up, or service-charge feature. The closest workaround is a dedicated Tip product in your catalogue (see Products) — add it to the order before completing payment.
Split payment
Split Payment lets one order be paid across multiple methods — for example, part cash and part card.
To enable the button: go to Settings and turn on Split Payment Button.
At checkout, tap Split Payment to open the modal:
- The total and a Remaining chip are shown at the top.
- A payment entry row appears with a method dropdown and an amount field. Type the amount paid by that method on the numpad.
- Tap + Add Payment to add another method for the remainder.
- When Remaining reaches zero, tap Complete.
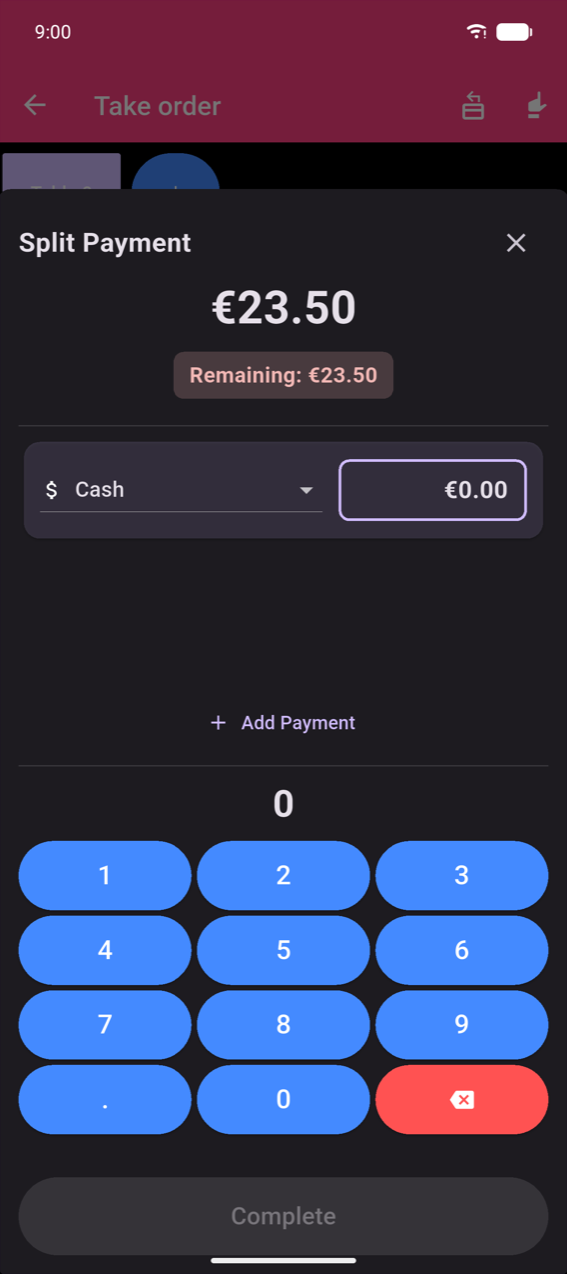
(This screenshot was captured during SEPA setup — amounts show in €. The Split Payment flow is identical in all currencies.)
Split bill
Split Bill divides the items among guests so each person pays only for what they ordered.
To enable the button: go to Settings and turn on Split Bill Button.
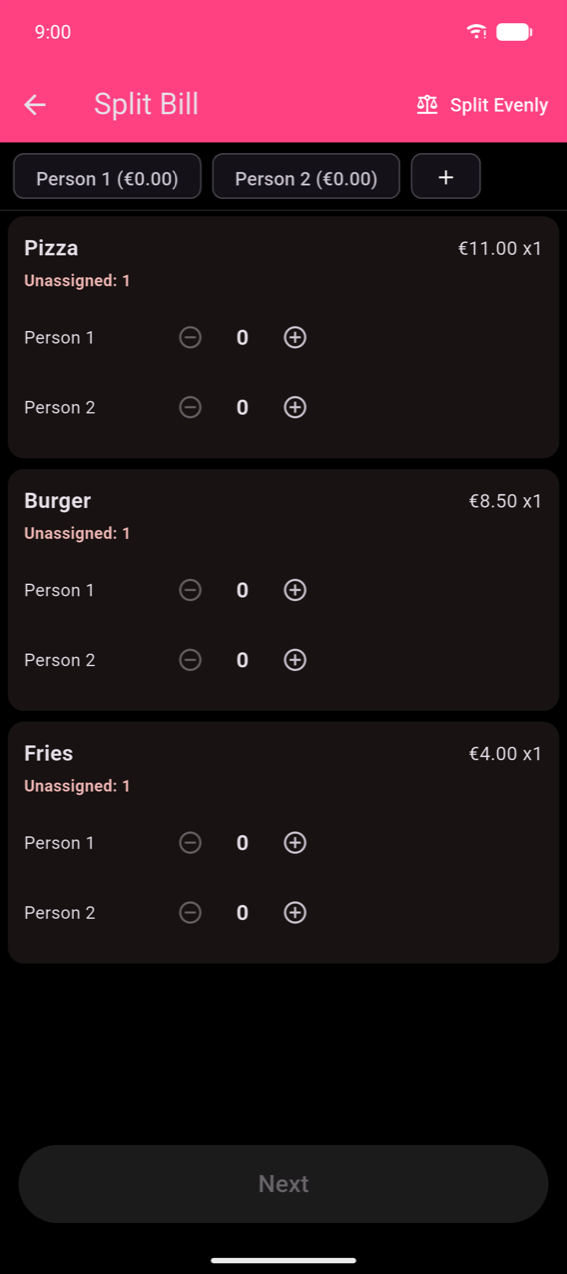
At checkout, tap Split Bill. The flow has two steps:
Step 1 — Assign products. Each product card shows an Unassigned count and a ± stepper per person. Tap + in the person chip strip to add more guests; long-press a chip to remove one (minimum 2). Tap Split Evenly in the app bar to distribute items automatically. Next becomes active once every unit is assigned.
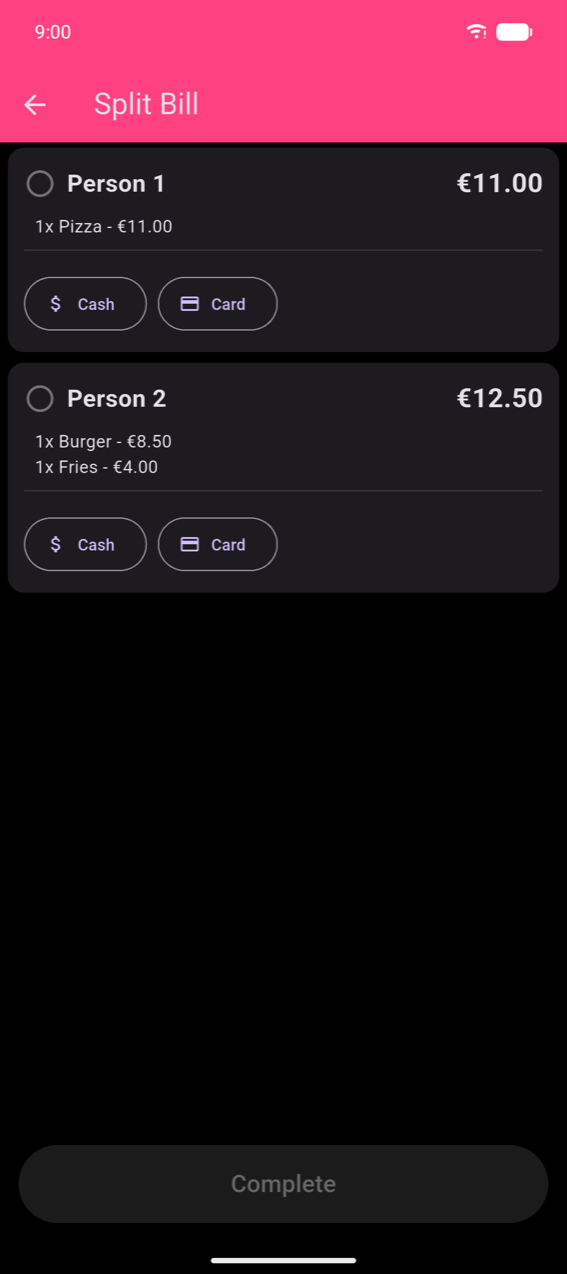
Step 2 — Pay per person. Each person's card shows their items and subtotal. Tap Cash or Card on a person's card to mark them as paid. Complete becomes active once everyone is fully paid.
SEPA QR
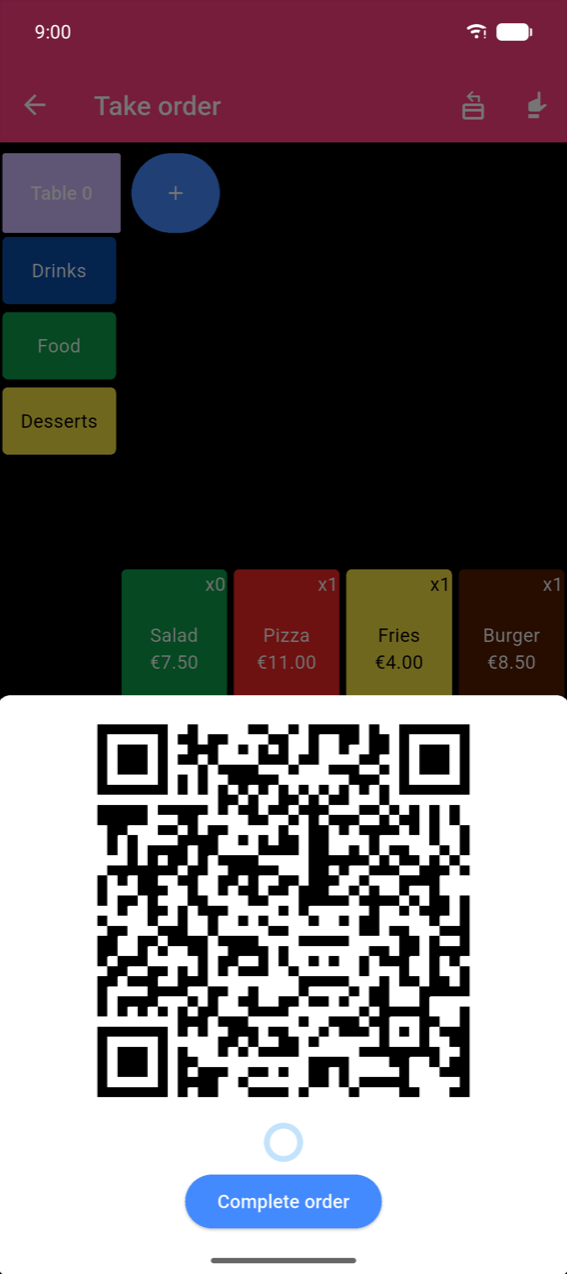
SEPA QR generates a payment QR code that customers scan with their banking app to transfer the exact order amount — no fees, no card reader needed.
Setup: go to Settings → SEPA QR and enter your IBAN, BIC, and account name. SEPA QR requires your currency to be set to € (EUR).
At checkout a QR icon appears; tap it to display the QR code. The customer scans it and confirms the transfer in their banking app. Tap Complete order to record the sale (registered as Card).
Warning
The app cannot verify that the SEPA transfer was actually completed. Always confirm with the customer that their banking app shows a successful transfer before tapping Complete order.
Note
SEPA QR is widely used in Austria, Belgium, Finland, Germany, and the Netherlands. It is not supported by all banks in other countries.
Kitchen vouchers
When Voucher mode is on (Settings → Voucher mode), completing an order prints a kitchen ticket alongside the customer receipt. Vouchers are formatted for kitchen readability — no prices, large text, items grouped by category or product.
To configure the voucher layout, go to Settings → Customize Voucher. The Preview tab shows a live monospace render of the ticket.
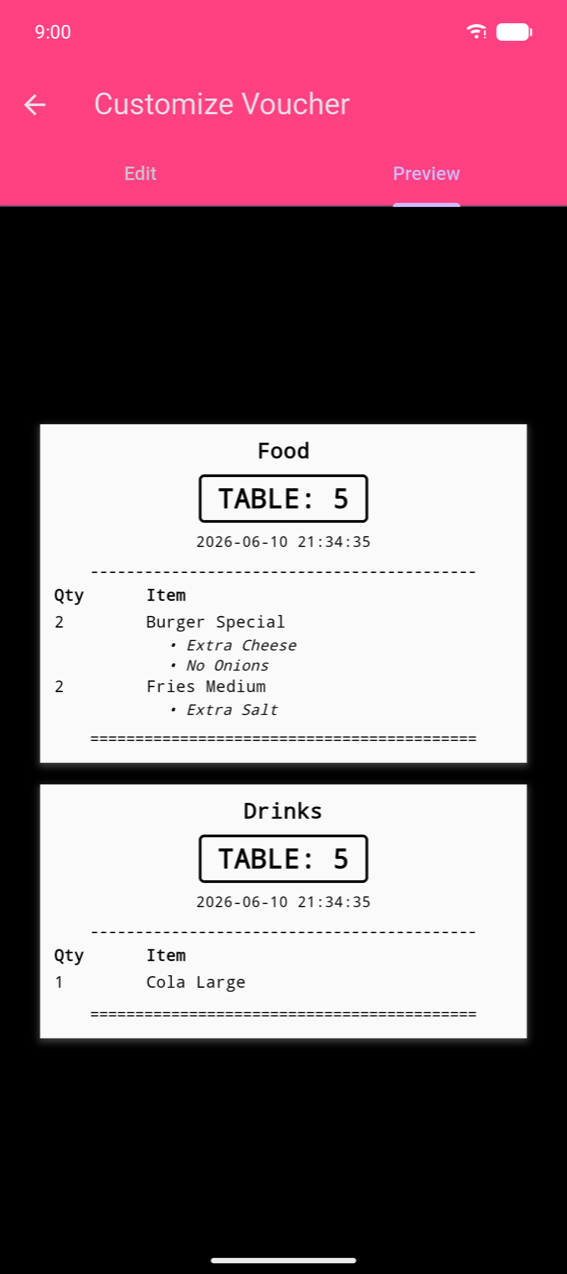
Voucher split mode controls how many tickets print per order:
| Mode | Behaviour |
|---|---|
| Per Category | One ticket per product category |
| Per Product | One ticket per product line |
| Single Ticket | One combined ticket for the whole order |
For printer setup and print triggers, see Printing & receipts.
Reprinting a receipt
If you enabled Reprint Receipt Button in Settings, a receipt icon appears in the Take order app bar. Tap it to open a list of recent orders and reprint any receipt. Reprinted copies are marked *** COPY *** to distinguish them from originals.
Checkout screen personalisation
You can show a thank-you message and optional QR code (e.g. a review link) at the bottom of the checkout screen — visible to the customer during payment. Configure this in Settings → Customize checkout screen. See Settings.