Settings
Open Settings by tapping the white gear icon in the top-right corner of the home app bar. There is no Settings tile on the home grid.
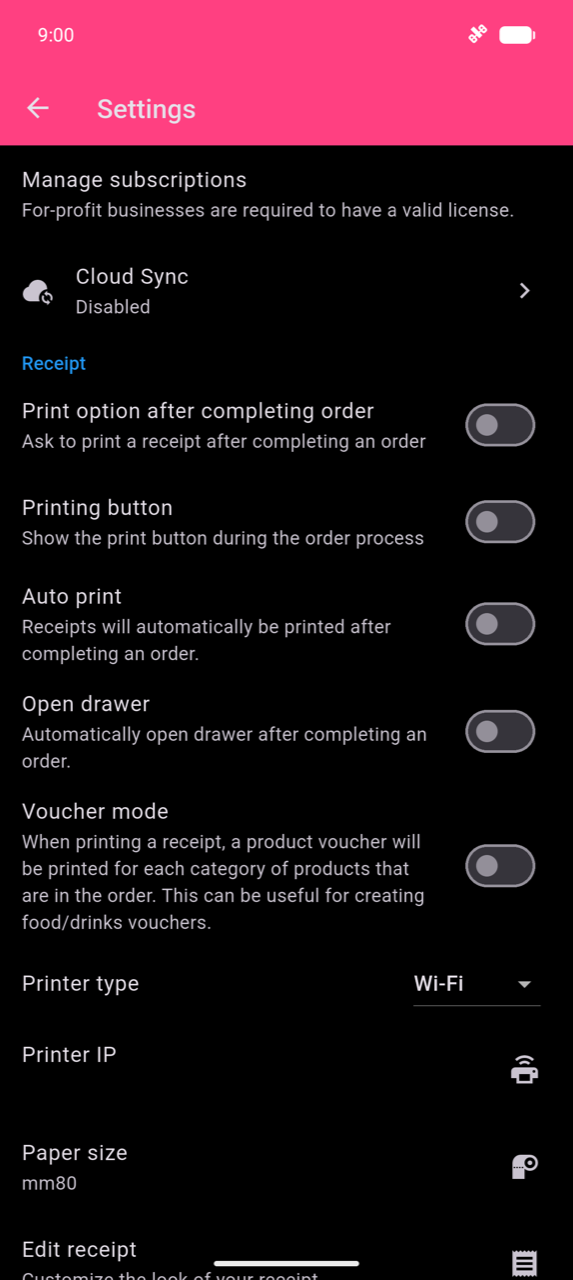
Receipt & printing
For printer setup, print triggers, paper size, and troubleshooting, see Printing & receipts.
Editing receipt content
Tap Edit receipt in the Receipt section to customise what appears on your printed receipts. The screen has two tabs:
- Edit — fill in your Receipt title (business name), Address, and
Extra info lines. Tap the logo field to choose a
.pngfile for your logo.
Warning
Only .png files are supported for the receipt logo.
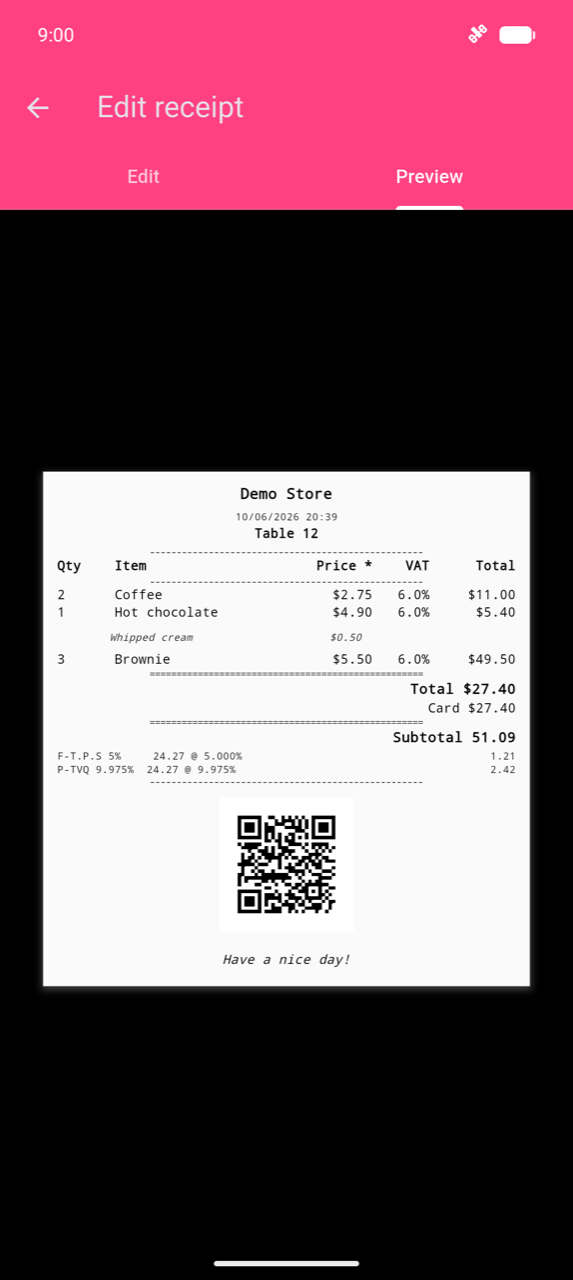
- Preview — shows a rendered dummy receipt with your current settings, including any VAT columns, tax breakdown, and QR code.
For compatibility modes (garbled text, logo rendering), the QR-code-on-receipt option, and cash drawer setup, see Printing & receipts.
Taxes
Setting up tax rates
- Tap Tax Configuration in Settings.
- Tap + in the app bar to add a new tax.
- Enter a Tax Name (e.g. "GST", "PST", "HST") and a Percentage.
- Enable Compound Tax if this tax should be calculated on top of other taxes already applied to a product.
- Leave Active on to apply the rate immediately. You can deactivate a rate without deleting it.
- Tap Save.
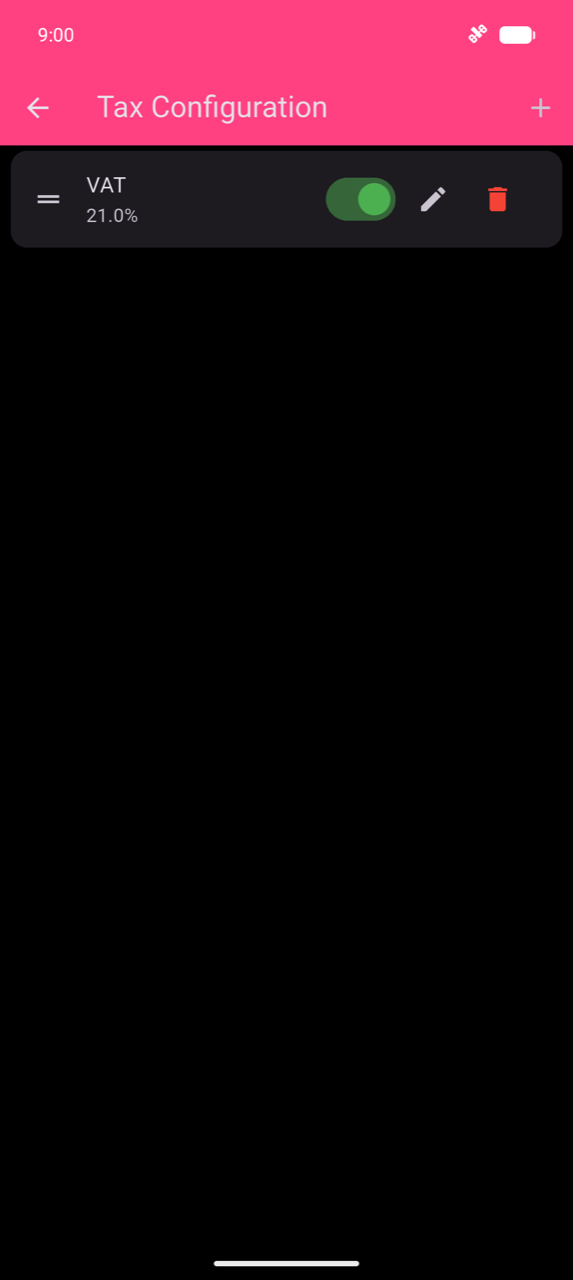
To edit a tax, tap the pencil icon. To delete it, tap the trash icon. Drag the handle (≡) on the left to reorder rates.
Note
Taxes are assigned to products separately — creating a tax here does not automatically apply it to anything. Use Bulk Tax Assignment (below) or tap Configure Taxes inside an individual product. See Products & categories.
Assigning taxes to products
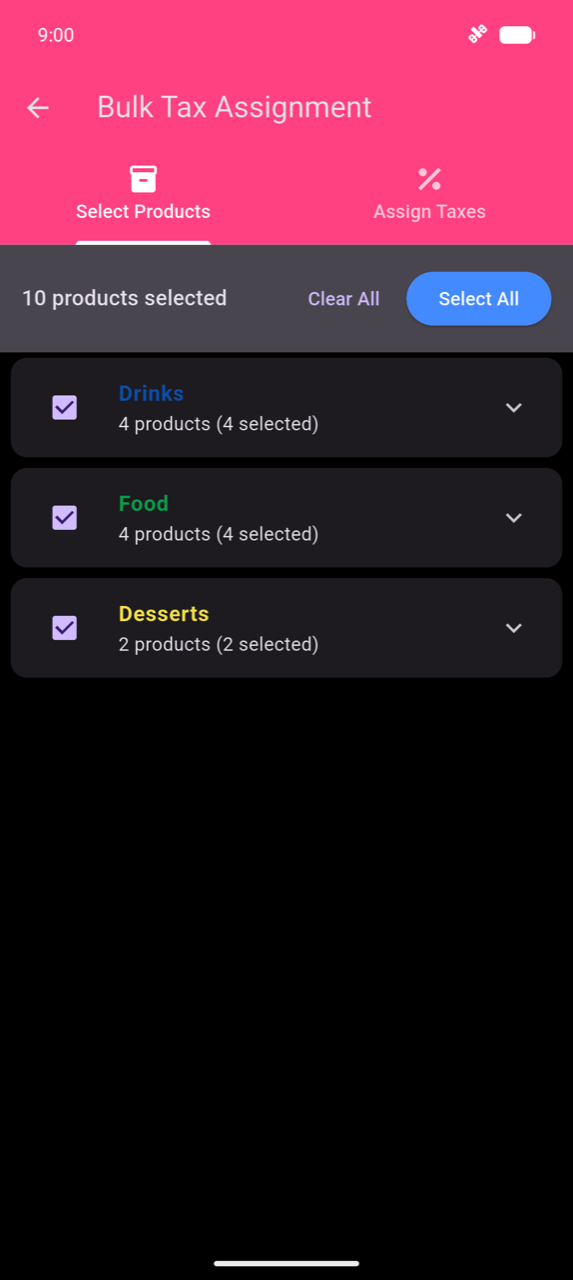
Bulk Tax Assignment applies a tax to many products at once, saving you from editing each product individually.
- Tap Bulk Tax Assignment in Settings.
- On the Select Products tab, check the categories or expand them to check individual products. Tap Select All to select everything.
- Tap the Assign Taxes tab.
- Check the taxes you want to apply.
- Tap Apply Selected Taxes.
Warning
Bulk assignment replaces the existing taxes on every selected product — it does not add on top. To remove all taxes from a selection, tap Remove all taxes from selected on the Assign Taxes tab.
Backups
Backup Management creates snapshots of your data that you can restore if something goes wrong or if you are moving to a new device.
Creating a backup
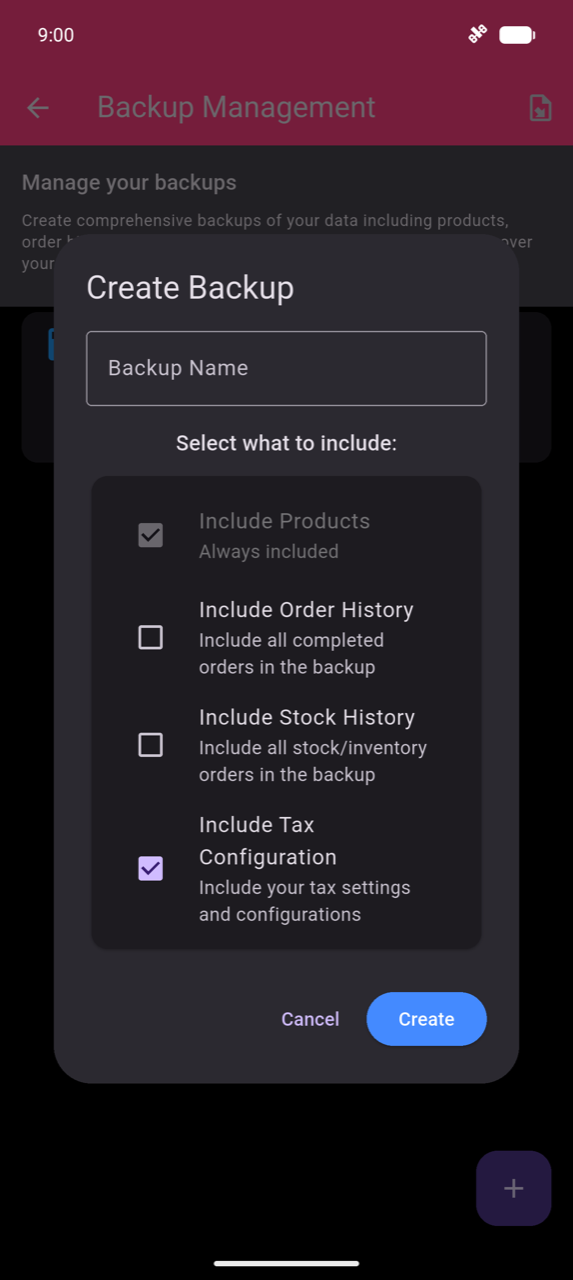
- Tap Backup Management in Settings.
- Tap +.
- Enter a Backup Name.
- Choose what to include: Products and Tax Configuration are always included. Tick Include Order History or Include Stock History if you want those records in the snapshot.
- Tap Create.
Restoring or exporting a backup
Each backup card has a three-dot menu with three actions:
| Action | What it does |
|---|---|
| Restore | Replaces current data with the backup — cannot be undone |
| Export | Shares the backup as a .json file |
| Delete | Removes the backup card |
To load a previously exported .json file onto a new device, tap the
import icon in the Backup Management app bar.
Warning
Restoring a backup permanently overwrites all data covered by that backup. There is no undo.
Security: Protect pages
Protect pages requires authentication before opening specific screens — useful when multiple staff members share a device and some should not have access to Order history, Statistics, or Settings.
- Tap Protect pages in Settings.
- Toggle on each page you want to lock: Take order, Edit buttons, Order history, Export, Manage inventory, or Settings.
Toggling a page requires you to authenticate first (device PIN or biometric). Once protected, that page prompts for authentication every time it is opened.
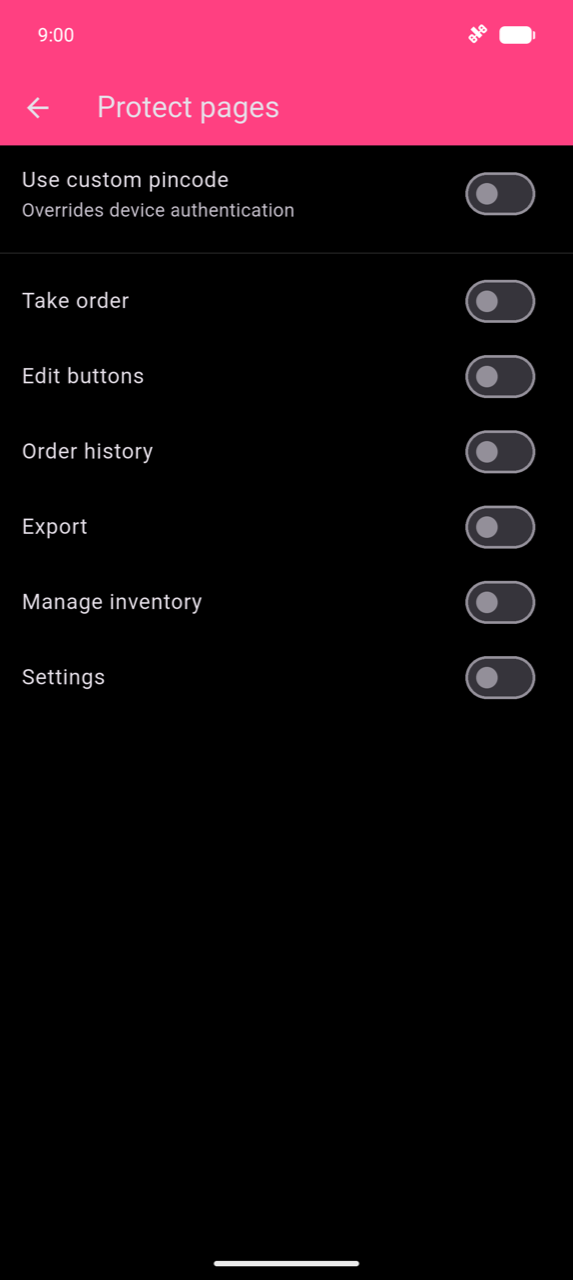
To use an in-app PIN instead of device authentication, enable Use custom pincode. You will be prompted to enter and confirm a four-digit PIN.
Warning
The custom PIN cannot be reset if you forget it. Write it down before enabling this option.
Customize checkout screen
The checkout screen can display a thank-you message with an optional QR code or image — visible to the customer while you complete the payment.
- In Settings, scroll to the Checkout screen section and enable Personalize checkout screen.
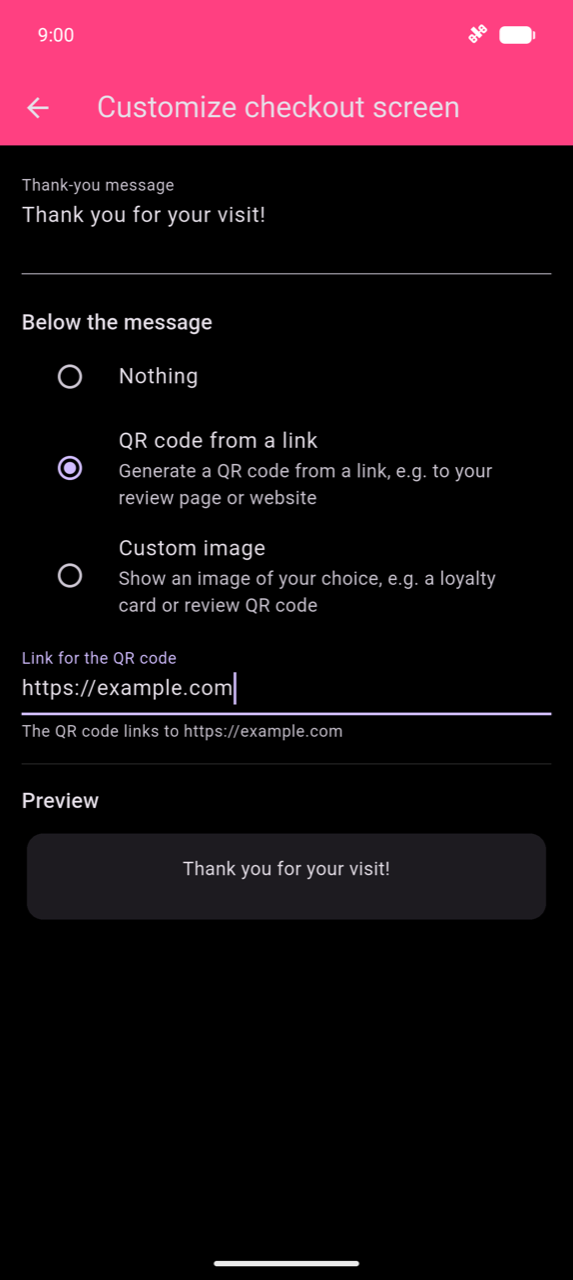
- Tap Customize checkout screen.
- Enter your Thank-you message (e.g. "Thank you for your visit!").
- Under Below the message, choose one of:
- Nothing — message only
- QR code from a link — enter a URL and the app generates the QR code automatically
- Custom image — choose an image file (not available in the web build)
- The Preview card at the bottom of the screen updates live.
Floor plan
The floor plan replaces the plain table-number entry with a visual room map when assigning orders to tables. Before enabling it, turn on Multiple orders in the General section of Settings — the Floor plan option only appears when multiple orders are active.
Enabling the floor plan
- In Settings, scroll to General and enable Multiple orders.
- Still in the General section, enable Floor plan — the toggle appears directly below Multiple orders once it is on.
- Tap Edit floor plan to build your layout.
Building the layout
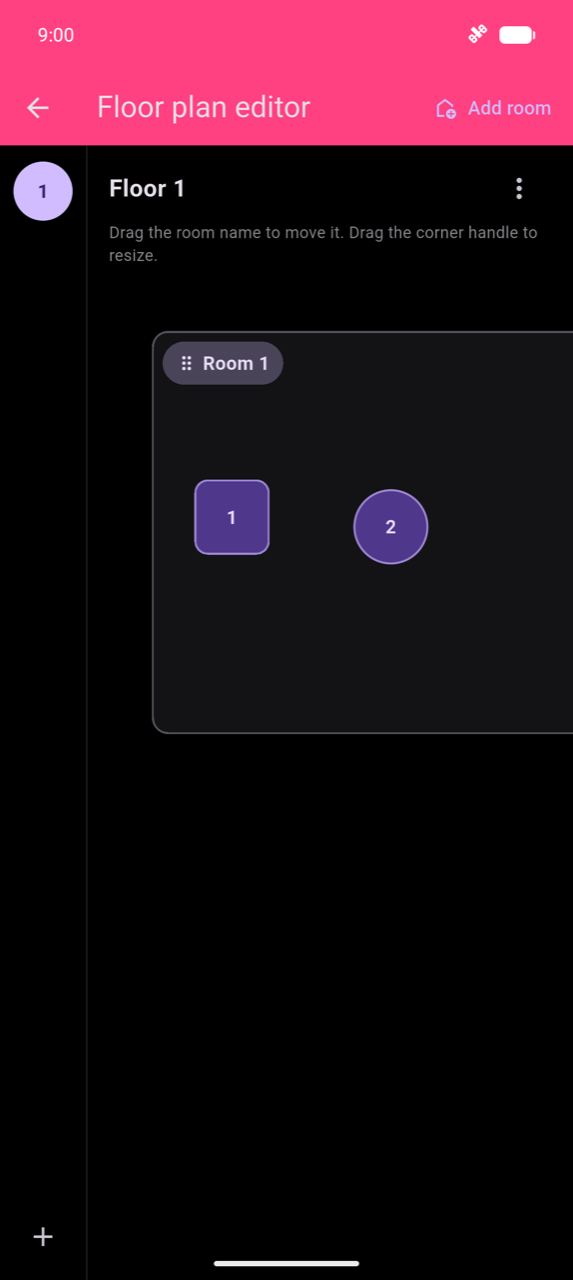
Add a floor: tap + at the bottom of the screen, enter a Floor name, and tap Save. Each floor appears as a numbered circle in the left sidebar.
Add a room: with a floor selected, tap Add room in the app bar. Drag the room name to reposition it on the canvas; drag the corner handle to resize the room.
Add a table: tap inside a room on the canvas, or open the room's context menu. Enter a Table number or name and choose a shape — Square or Round. Drag tables within their room to arrange them.
When the floor plan is active, starting a new order opens the visual table picker instead of the number pad. See Taking orders.
Theme
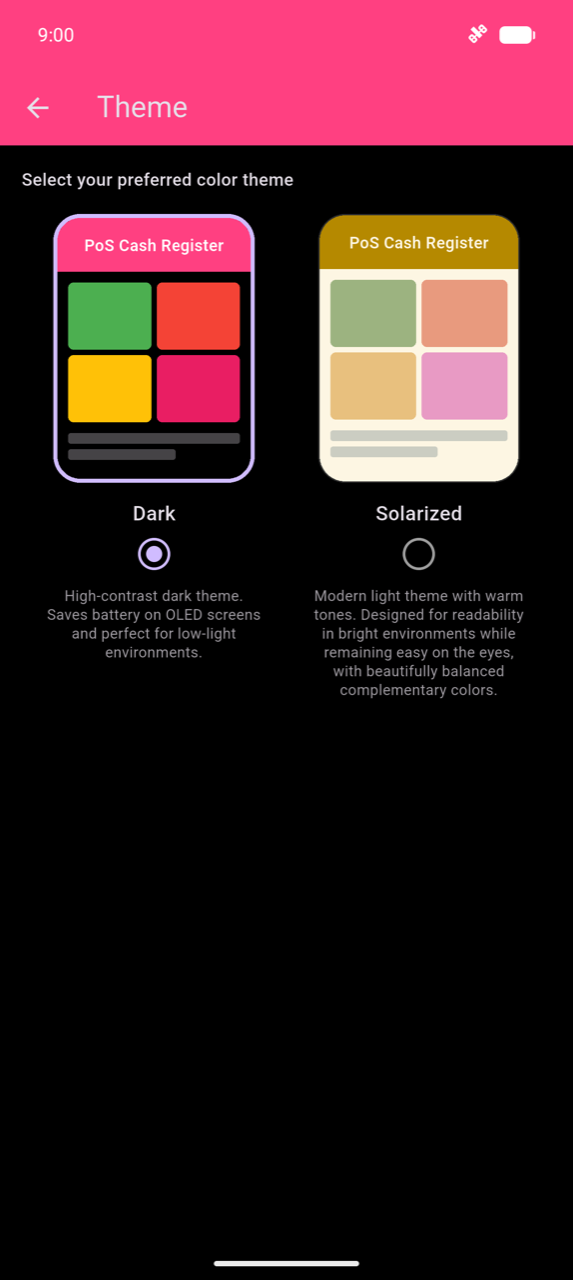
Tap Theme in Settings to switch between two color themes. Tap a theme card to apply it immediately — no restart needed.
| Theme | Description |
|---|---|
| Dark | High-contrast dark theme; recommended for low-light environments |
| Solarized | Warm light theme; easier to read in bright environments |