Taking orders
Tap Take order on the home menu to open the order screen.
The Take order screen
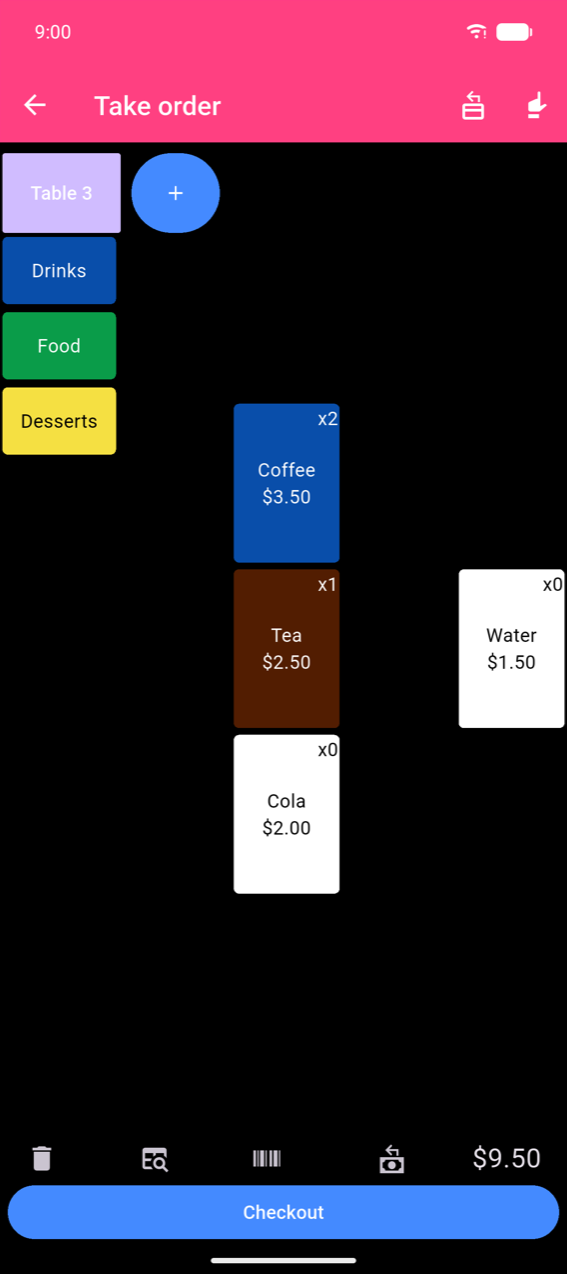
Category buttons run down the left side. Tapping a category switches the product grid on the right. The bottom bar shows a running total and a Checkout button.
Note
Prices on Take order and checkout screens are formatted using your device's locale setting. Prices in product-management screens (Edit buttons, Edit product) use the currency configured in Settings → Currency. It is normal for these to show different symbols or decimal formats — the behaviour is by design.
Adding products
- Tap a product button to add one unit immediately. The button's badge increments with each tap.
- Long-press a product already in the order to open the product sheet pre-filled with its current quantity — use this to change the quantity or options, or remove it by setting the quantity to 0.
- Weight-priced products (those with Allow fractional amounts enabled) open an Enter weight numpad before adding. Enter up to three decimal places and tap Ok.
Choosing options and adjusting quantity
Tapping a product that has options opens the product sheet instead of adding immediately.
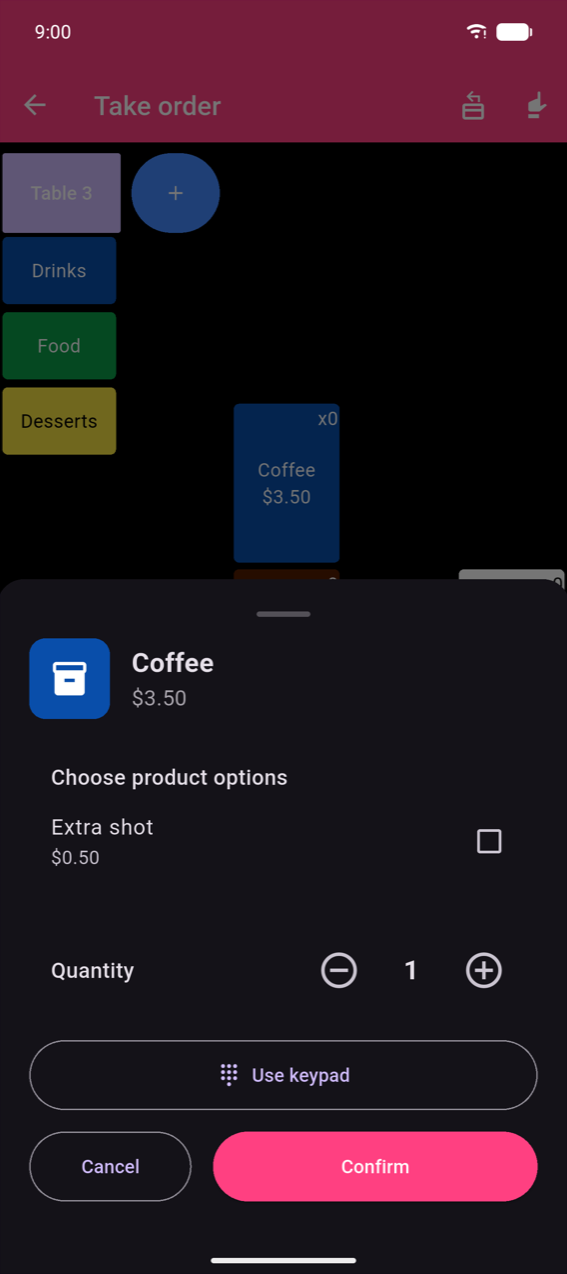
- Check any options you want, then adjust Quantity with the − / + stepper.
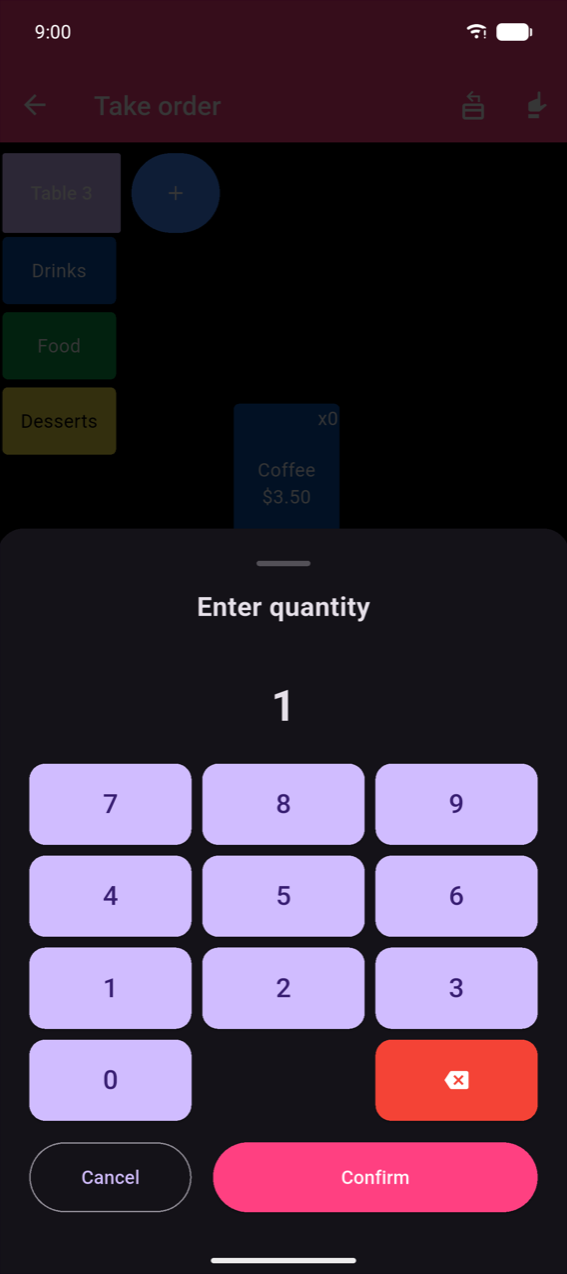
- For large quantities, tap Use keypad to enter the number directly.
- Setting Quantity to 0 removes the product from the order.
- Tap Confirm to apply; Cancel to dismiss without changes.
Multiple orders and tables
By default the screen holds a single persistent order. Enable Multiple orders in Settings () to show a strip of order/table buttons at the top.
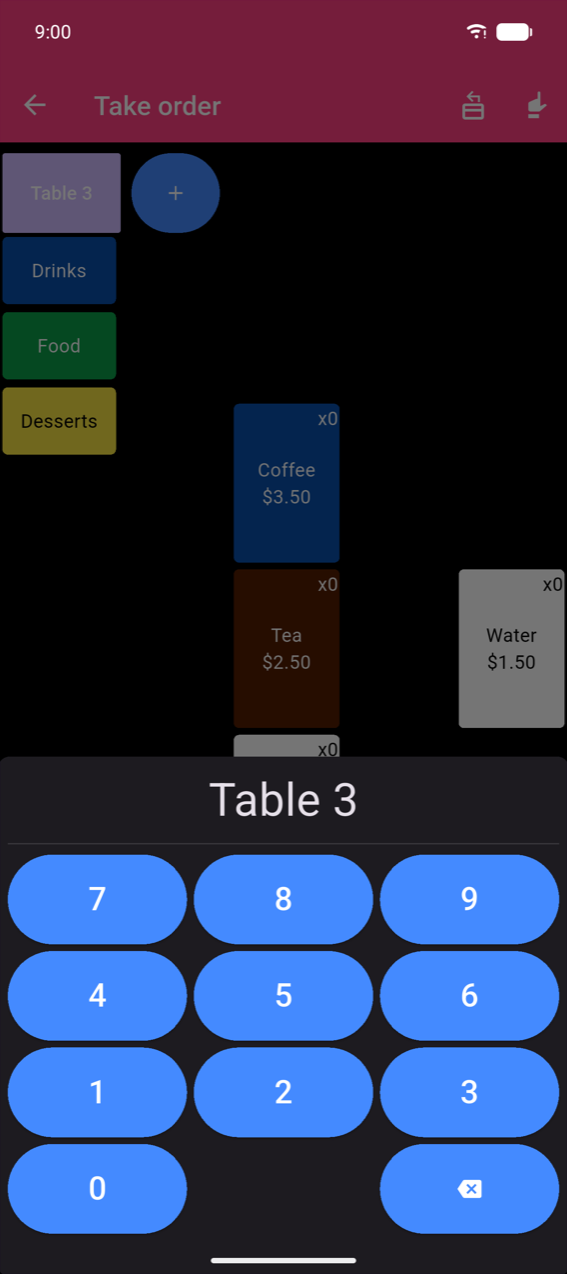
Tap + in the strip to open a new order and enter a table number.
Note
If Free input is enabled in Settings alongside Multiple orders, the + keypad is replaced by a free-text field — useful for entering customer names or labels instead of numbers.
Floor plan table picker
When Floor plan is also enabled in Settings (), the + button is replaced by a dedicated Select a table button that opens the visual table picker directly.
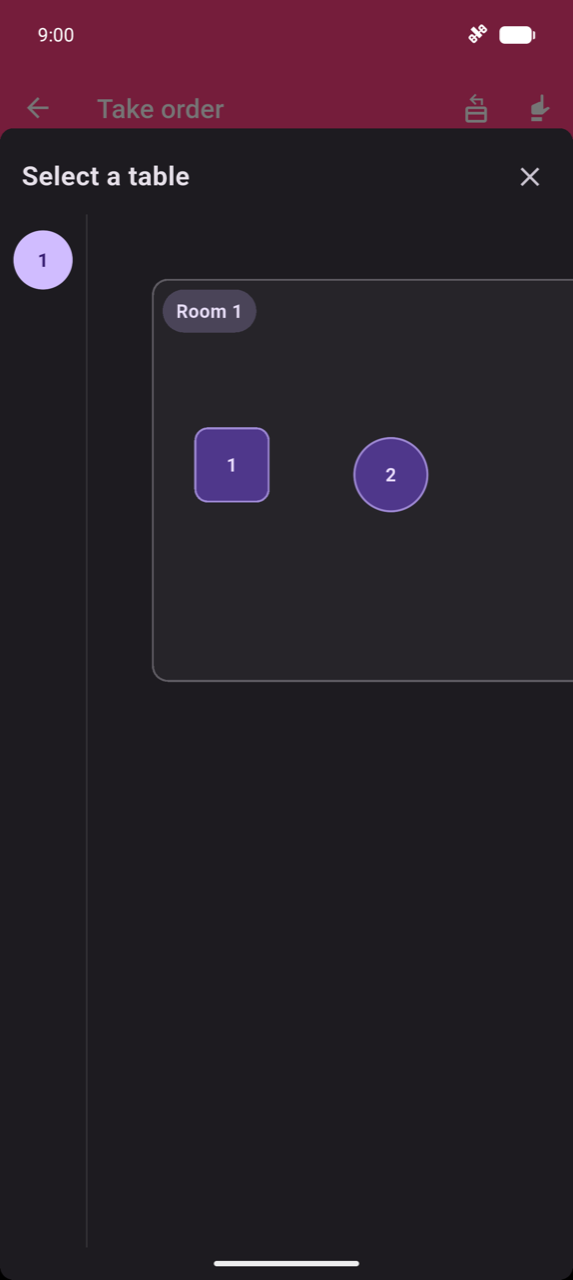
Select a floor in the sidebar, then tap a table on the canvas. Build and edit the floor plan in Settings → Edit floor plan — see Settings.
Note
If no floor plan has been built yet, the picker shows "No floor plan configured yet. Set it up in Settings > Edit floor plan."
Scanning barcodes
Camera scan — tap the barcode icon () in the bottom bar to open the full-screen scanner (the scanner screen looks identical to the one shown in Products & categories). Torch and camera-flip controls appear as overlays; there are no text labels on this screen. Point the camera at a product barcode:
- Known barcode — opens the product sheet.
- Unknown barcode — shows "The barcode you scanned is unknown." Tap Link to product to attach the barcode to an existing product, or Ignore to dismiss.
Continuous scan session — a persistent scanning mode where the camera stays open and each scan is added to the order instantly. A Last scanned card shows the most recent product with ± correction; a Scanned this session list tracks everything added. Tap the green Done button to close the session and return to the order. Unknown barcodes surface an orange card with the same Link to product / Ignore options.
Hardware scanner (keyboard-wedge) — scans via a Bluetooth or USB barcode scanner connected as a keyboard. Each scan adds one unit and shows a brief green overlay near the top reading "{Product} added" with an item count. Tap the overlay before it auto-dismisses (~2 s) to open the product sheet with the scanned quantity pre-filled.
Searching for products
Tap the search icon in the bottom bar to open Product search. Start typing — results update as you type. Tap a result to open the product sheet.
Checkout overview
Tap Checkout (disabled when the order is empty) to open the order summary.
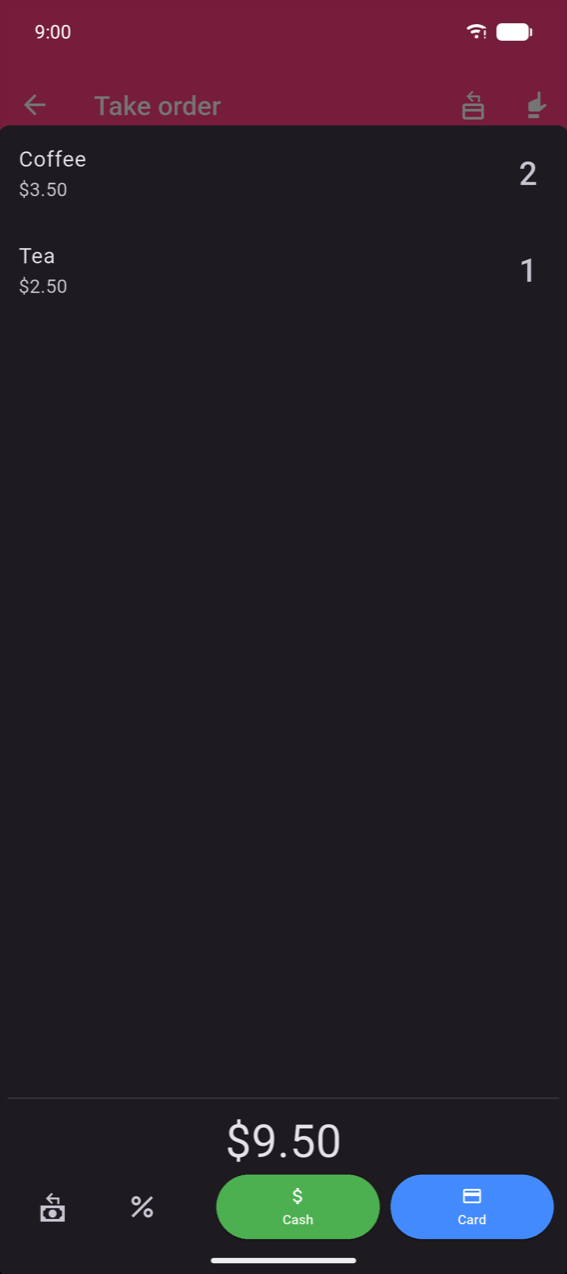
Swipe any line left to reveal Remove one and Remove all. The payment method buttons and the rest of the checkout flow are covered in Payments.
Refund mode
When Refund Mode Button is enabled in Settings (it is on by default), an icon in the Take order app bar toggles refund mode. The entire background turns dark red to confirm the mode is active.
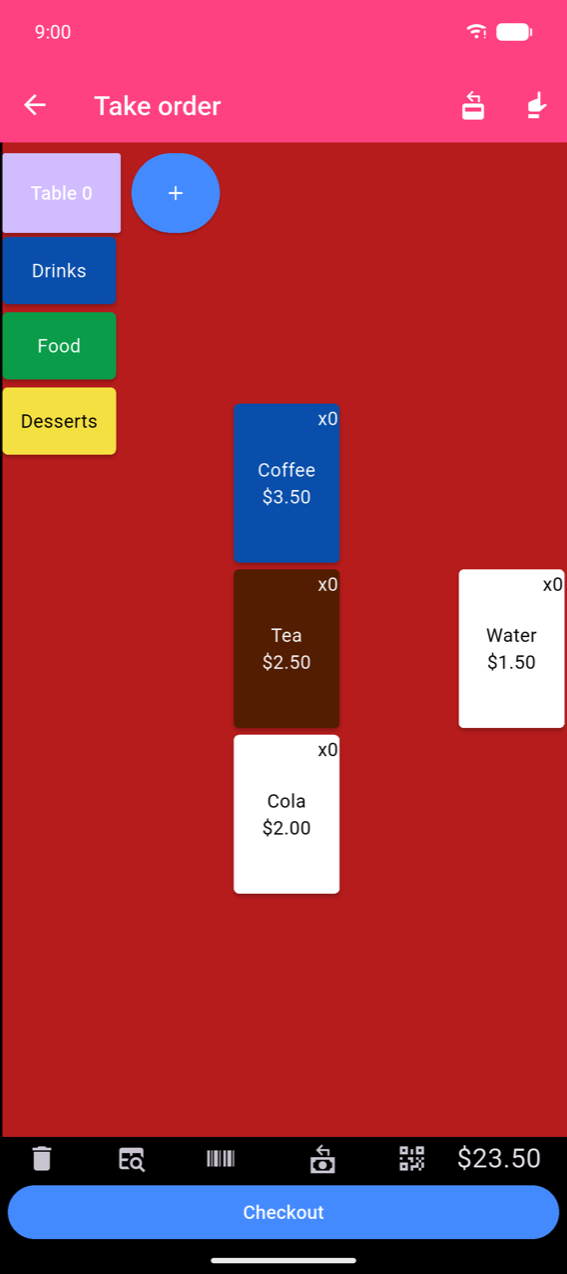
While in refund mode, tapping products subtracts quantities. Complete the order as usual; the finished order is marked with a red Refund badge in Order history.
Tap the same icon again to exit refund mode.